Study after study has proven that Guided Math is a powerful approach with big results in the elementary classroom. But, many teachers are hesitant to start because they lack the necessary background knowledge to pull it off effectively. Getting organized for Guided Math is a critical first step. Here are four things you should consider when setting up your classroom for Guided Math.
Once you figure out what Guided Math program you’re going to use, there are several things that you need to take into account to really get organized:
- storage
- creating groups
- organizing groups
- managing group expectations
Organize Storage for Guided Math
Figuring out how you will store your centers, manipulatives, and student materials is a HUGE part of being ready for the Guided Math process. They need to be ready to go before the session begins. You do not want to spend your valuable small-group teaching time trying to get the right tools into the hands of the right students.
In my classroom, I first organize my centers by topic and use magazine holders to keep all the activities together.
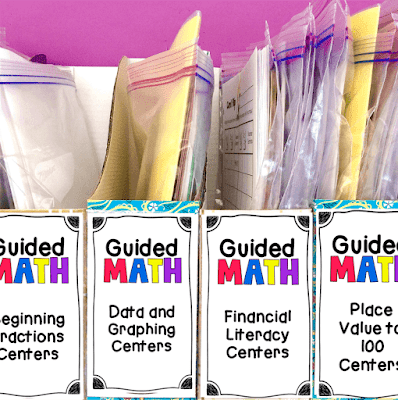
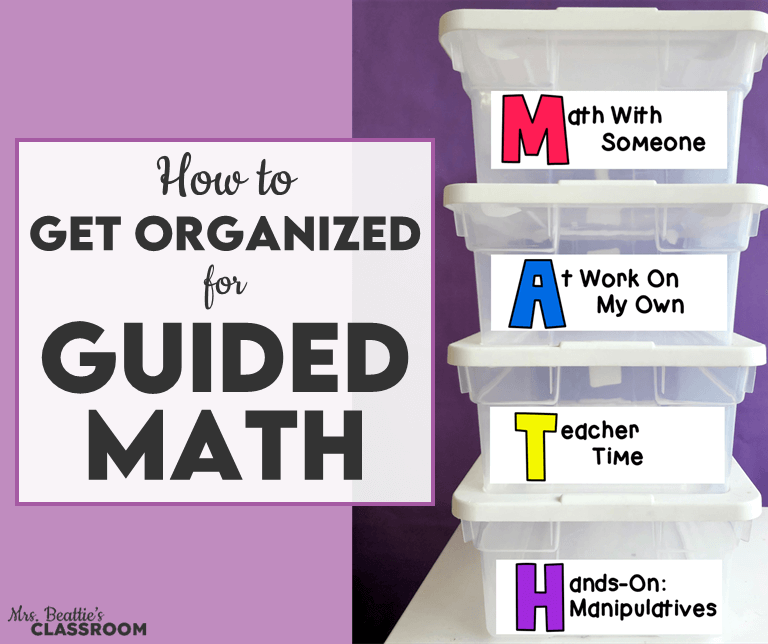
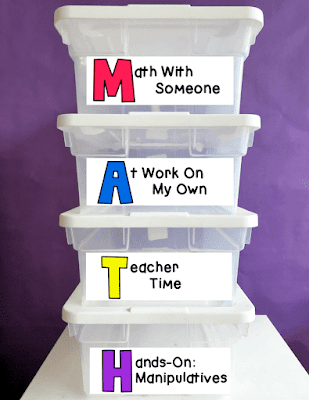
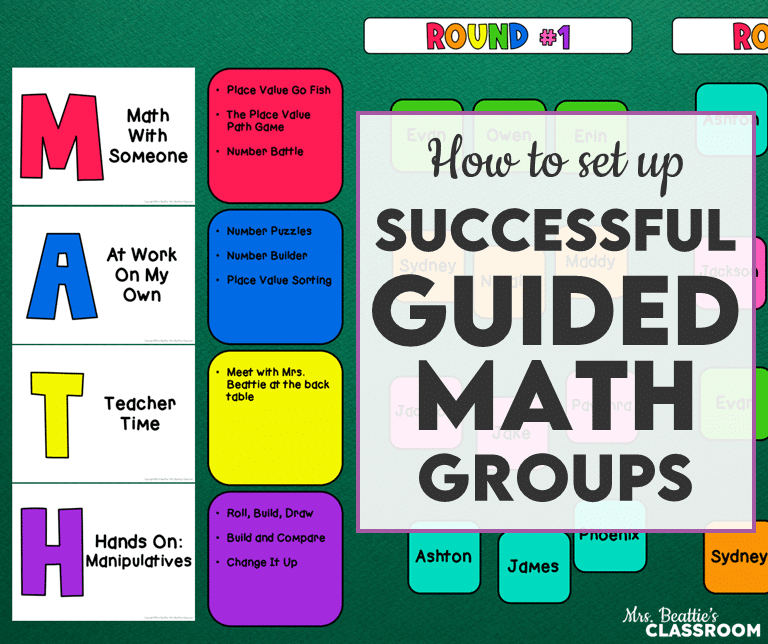
Within each of these topic boxes, I have my centers arranged into three groups based on the structure of my Guided Math program: Math With Someone, At Work On My Own, and Hands-On – Manipulatives. (You’ll notice that these three groups, plus the small-group Teacher Time, create the acronym M. A. T. H.)
I only have one topic on hand at a time, so there is little confusion about which centers belong in which set.
Next, each of the groups mentioned above contains a variety of individual activities. I generally store these inside large freezer bags, although large manila envelopes would also do the trick. The different activities are then kept inside a set of clearly labeled bins I purchased at Walmart for easy student access throughout the unit. I usually provide several activities within each group because the power of choice is a HUGE motivator, and I love how my students stay engaged with these. Although you could pick and choose which activity you would like your students to complete during their rotation.
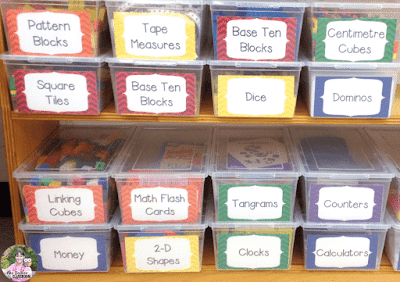
All of my math manipulatives are in a central location in my classroom – clearly labeled and easily accessible for my students. There is never a question of not being able to find something.
Creating Groups for Guided Math
My groups are ability-based, although you can create them any way you wish. At the beginning of a new unit, I do one of a variety of things to get a handle on what my students know and identify where the gaps in prior learning are:
- I love to start with a math story related to the topic and get my students talking about the concepts. This always yields great formative data.
- You may begin with whatever formative assessment package your board or district has chosen for your grade level.
- Choose a whole-group activity that will allow you to observe your students engaging with the content. You’ll quickly be able to see the strengths and weaknesses and be able to create groups from there.
- If you can manage it, conduct a quick interview or survey to gauge your students’ understanding of the topic. A quick one-on-one chat will provide a ton of information.
Organizing Guided Math Groups
Once I know what my students can and cannot do, I sort them into four groups. I try to group them with students with similar strengths and needs, but my groups always remain fluid, and my students know this. Even though I teach in a cross-grade classroom, I rarely group my students by grade. I think this has made my students more accepting of one another and less aware of differences in ability. #teacherwin
I display my groups on a bulletin board organized to show two daily rotations. In some years, I’ve aimed for more, but by the time I do a whole-group activity, two rotations are often perfect for our time. (We usually have about 60 minutes for math but transitions like undressing from recess in the middle of the winter always impact that time. It is what it is!)
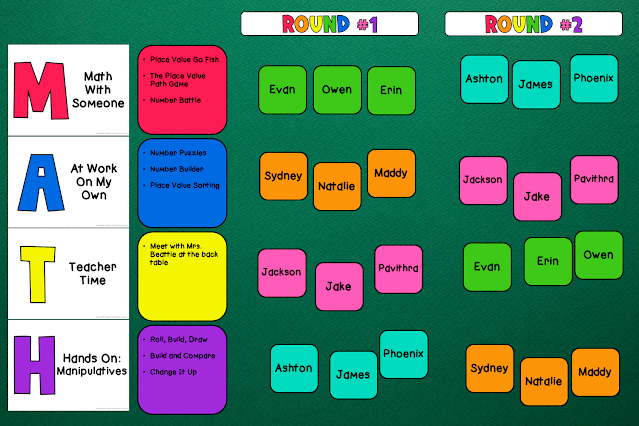
In this photo, I have the student names on the small pieces and the activity centers that are in the bins labeled on the large pieces. I have also used large pieces to identify members of each group and have them duplicated. We can see at a glance which station to switch to when it is time to transition.
If you’ve already signed up to receive the Guided Math Starter Kit, which includes FREE centers, keep an eye on your email for a sample center rotation schedule! If you haven’t signed up yet, you can do that here:
Managing Guided Math Group Expectations
For Guided Math to truly work, you need to have expectations in place for what the students outside of your small group are doing. It takes a lot of practice to get it running like it should, but it is entirely worth it once your Guided Math time begins running smoothly.
I organize my expectations very similarly to the expectations in The Daily 5. Since we use this structure during our literacy block, applying these skills to the new subject happens seamlessly.
We begin by establishing the “why,” our purpose or goal for participating in Guided Math. After this, we brainstorm together (although I have these ideas already in mind – be prepared with exactly what you want) a list of expected student behaviors – basically, what it should look like and sound like when your students are doing what is expected during centers.
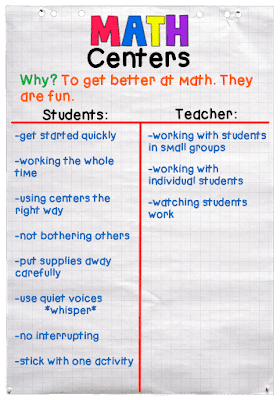
Remember that you are supposed to be working with a small group on Teacher Time activities, so you aren’t available to solve the little problems. It is a great idea to anticipate issues that may arise and have a discussion about what students should do in these cases.
Some common problems to consider are:
- “I don’t know what to do.”
- “I’m finished.”
- “I need to go to the restroom.”
- “Can I get a drink?”
- “Where is/are the…?”
The centers I’ve created for my classroom, which you can take a closer look at HERE, have been designed to be relevant, on-topic tasks, puzzles, challenges, and games that students can complete independently. I didn’t want my students to get stuck on what to do. I didn’t want them to be unable to read the instructions. I also didn’t want the centers to be busy work that my students would tire of quickly. They are engaging and fun. Some require a little explanation, but I set some time aside at the beginning of the unit to take a closer look at the centers and explain these. I also have student helpers that others can go to for help if they are stuck while I’m working with a group.
If my students finish a game, I ask them to play again. The centers I’ve provided lend themselves to repeated use. This cuts down on students wandering around the classroom, looking for another activity, as this always results in off-task and disruptive students.
I clearly lay out my restroom and drink policies at the beginning of the year, and I always ensure that my students have access to the materials they need.
You’re Ready to Go!
If you have these things in place and have accessed my Guided Math Quick Start Guide, you’re ready to get started with Guided Math in your classroom! Congratulations! If you haven’t grabbed it yet, you can do that here:
You might be interested in reading the rest of the posts in this Guided Math series:
Pin this post for future reference!
